Skip to content
Clockdiaryclock diary
Menu
  • Pricing
  • Features
  • Blogs
  • Help Center
  • Contact Us
  • Download
  • Sign In
  • Sign up
  • Feature
  • Pricing
  • Testimonials
  • Instant Solution
  • Sign In
  • Book A Demo
  • Sign Up Free
Projects
  • How to Create a New Project
  • How to edit a project
  • How to Manage Project Access
  • How to Archive a Project
  • How to restore archived projects
  • How to assign project access to a member
Customers
  • How to Add a Customer
  • How to view customer details 
  • How to edit customer details 
  • How to archive customer details
  • How to restore archived customers
Teams
  • How to Create a Group
  • How to Add Members to a Group
  • How to Remove Members from a Group
  • How to Add Members to A Team
  • How to Remove Members from Teams
  • How to Archive a Member in Teams
  • How to Assign a Role to a Member
Work Zones
  • How to add a new workzone 
  • How to update workzone settings
  • How to delete a workzone
Labels
  • How to add labels
  • How to archive or restore labels
Profile Settings
  • How to change password
  • How to change profile picture
  • How to edit my profile 
Time Recorder
  • How to create a Time Entry
  • How to Signup 
  • How to create a duplicate time entry
Timesheet
  • How to Set Up and Use the Timesheet Feature
Activity Tracker
  • How to Enable or Disable Screenshot Tracking
  • How to Use the Activity Tracker for Employee Monitoring
  • Home
  • Clockdiary Help
  • Teams
  • How to Create a Group

How to Create a Group

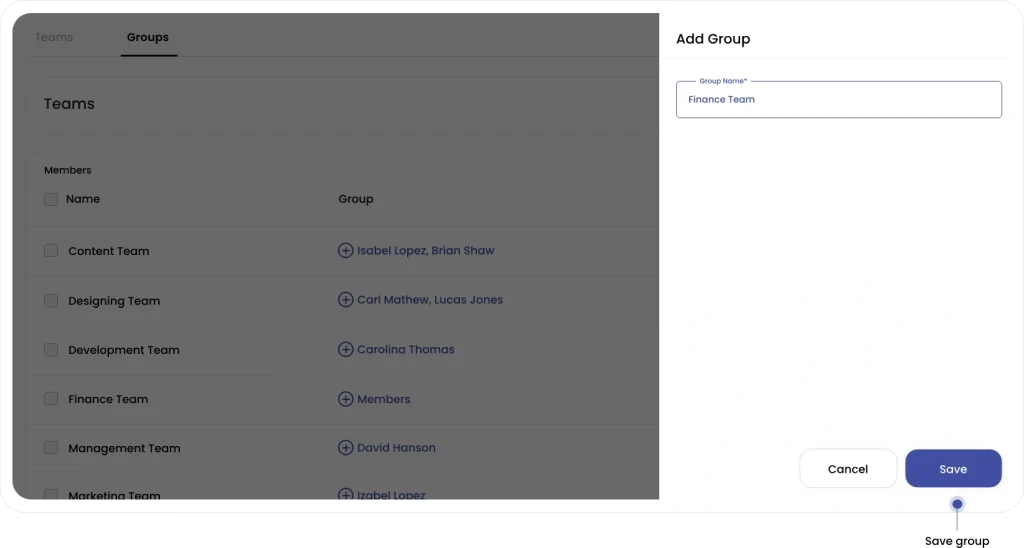
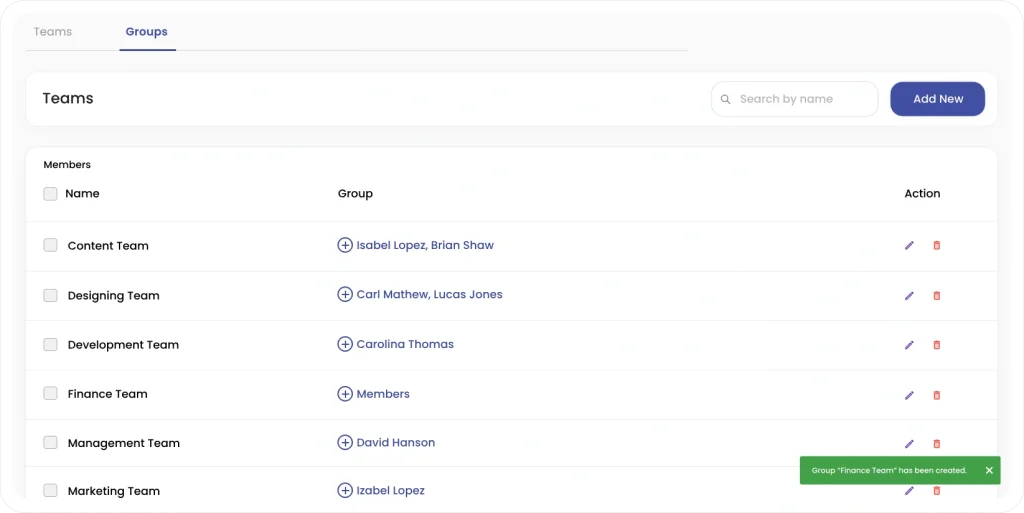
Clockdiary allows you to divide work by letting you create groups with the click of a button. By creating groups, you can assign specific individuals to a project and track the performance of your team members easily.  

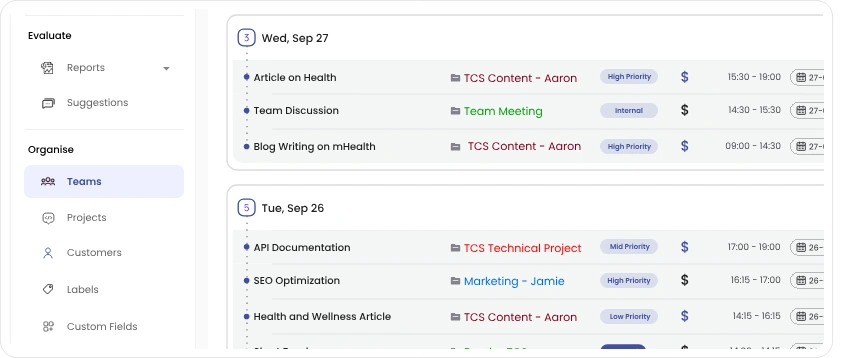
Step 1: To create a group, simply click on the Team option in the sidebar menu.

Team

Step 2: Click on Groups tab located next to Teams.

Groups tab

Step 3: Click on the Add New button, next to the Search Bar to add a group.

Add new group

Step 4: Once you click on the Add New button, the Add Group modal window will appear on the screen. Enter the Group Name into the required Group Name field.

Add new group

Step 5: Finally, click on the Save button.

Save group

Step 6: Once you click on the Save button group will be created. A pop-up notification at the bottom right will notify that group has been created. 

Group saved

If you still have any queries, please email us at support@clockdiary.com.

Share This Article :
  • Facebook
  • Twitter
  • LinkedIn
  • Pinterest
How to Add Members to a Group
Clockdiaryclock diary
Keep Updated
Quick Links
  • Blogs
  • Pricing
  • Military To Standard Time Converter
  • Time Card Calculator
  • Sitemap
  • Privacy Policy
Help Docs
  • Projects
  • Teams
  • Customers
  • Work Zones
  • Profile Settings
  • Time Recorder
Features
  • Time Recorder
  • Multiple Work Time Zones
  • Manage Teams
  • Manage Projects
  • Lock Time
Time Tracking Solutions
  • For Lawyers
  • For Accountants
  • For Freelancers
  • With Screenshots
  • For Remote Teams
Contact Us
  • Contact Us
  • Book A Demo

Copyrights © 2025 | Clockdiary All Rights Reserved